Monday May 5, 2014
We both had such a restful, laid-back weekend while our families waited on us hand and foot, did all the cooking, weeding, laundry, cleaning, and..... just who do we think we are kidding here???
We both did what we do over the weekend which had nothing to do with fantasy listed above*, this morning however we were raring to go.
First things first. Last Friday "A" was occupied taking kids to eye doctors and various other motherly deeds, so she hadn't sampled the wonderful scents that arrived from the Lebermuth Company ( +Lebermuth Co ). So we had a mini scent show, and oooh'd and aaaah'd over the new EOs (essential oils) and FOs (fragrance oils): Sweet Pea and Ivy FO, Lavender EO, Litsea Cubea EO, Peppermint EO, Bug be Gone FO, Lily of the Valley FO, The Vert FO, Wisteria and Lilac FO, and Oatmeal & Honey FO.
Yes, we might have gone just a little overboard.
We love all the new scents and actually used a couple today in some sugar scrubs we made, but more about that later. First we will show you the soap we made today.
Whilst looking at the multitude of soaps and soap blogs and all things soap related on the internet "K" had seen a gradient color soap that caught her eye. Since we now have a pile of new colors and scents, it was difficult to decide which to use. Ultimately, we decided to go with pink and use the Cannabis Rose fragrance oil we just got from Natures Garden ( +Natures Garden ), which by the way reminds us of the old heirloom roses that smell like, well....heaven.
The concept for this soap is to have the very darkest shade on the bottom layer of the soap, with each layer getting progressively lighter with white topping it off.
The two pinks we just got from Bramble Berry ( +Bramble Berry ) are on the opposite ends of the (pink) color spectrum and neither was exactly what we wanted, so we improvised and mixed the colors, using 1/4 tsp of the neon pink with 1/4 tsp of the ultramarine pink, this combo was exactly what we wanted. We added TD (titanium dioxide) to the soap to lighten it and we were ready to go.

The directions that we found for this design seemed a little tricky, but understanding is sometimes in just doing it. If you're thinking of trying this technique, don't worry. You can do it!
First figure out how many cups of soap you have, then decide how many gradient color layers you want, (we went with 7). We had 8-1/2 cups of soap, so we broke it down into 7 portions of approximately 1-1/4 cups each, (remember this is supposed to be fun and does not have to be exact).
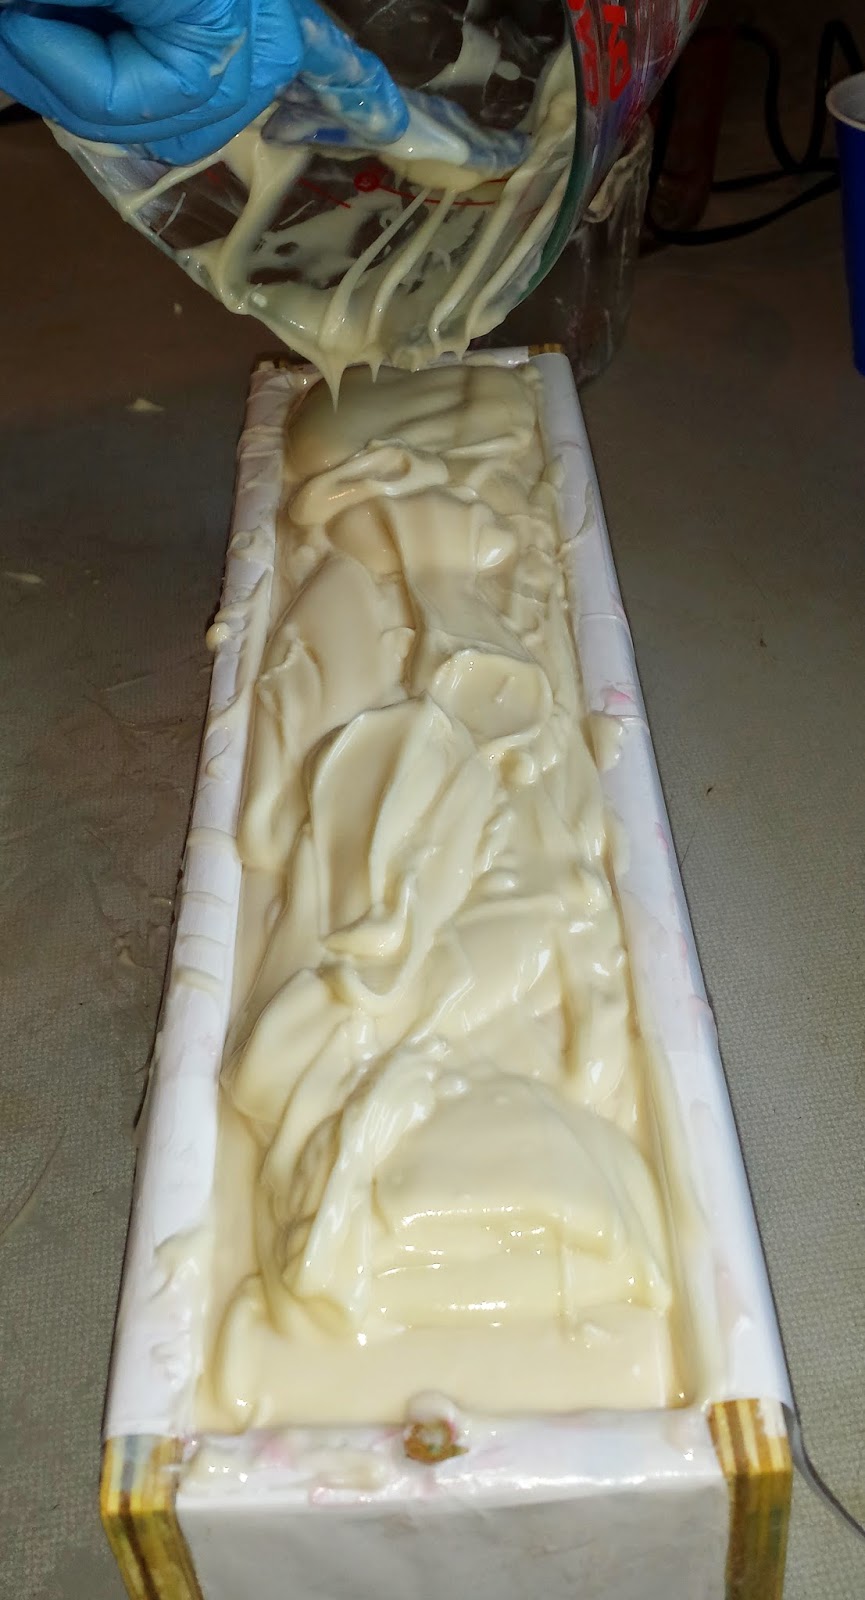
For the first "layer" we combined of 2 the seven 1-1/4 cup portions for a total of 2 1/2 cups of soap to which we added the pink colorant, in a blink we had the darkest gradient of pink.

Of that darkest pink, we only put 1/2 into the bottom of the mold. Once we spread about half of the dark pink into the mold we added another (approximate) 1-1/4 cups of what we will call white soap to the dark pink we had left over after the first pour.

The addition of the white to the dark pink took the amount back up to 2 1/2 cups and lightened up the soap a shade. We spread this lighter pink over the darker pink using about 1-1/4 cups of soap. Again we kept about 1-1/4 cups in the measuring cup and


We hope you can see a pattern here, each new layer that goes in the soap lightens the soap a "gradient" shade at a time.

The color is much lighter after several pours, the picture below may look white, but it is a pale, pale pink. The soap was getting really thick by the time we got to this layer, we were spooning the soap rather than pouring. Almost finished!

The next picture shows the last layer, you can see we were at THICK trace, the soap is white at this point, if you look closely you can see various shades all over the mold where the soap spilled as we poured.
The last picture (until we show you the cut soap) is the soap after we had swirled the top, it was ready to go in the cure box then be insulated with towels for the curing. Hopefully our "gradient pour" soap will look good. We always seem to have our doubts when we try a new one, but after all, this is fun. And, the soap does smell like we've fallen into a bed of rose petals.
Tuesday, May 6, 2014 we opened the soap this afternoon and we were surprised to find a small crack right down the middle of the top, we have no idea why it cracked, but will get on the computer and see if anyone else has had this problem.

The soap isn't exactly like we thought it would be, but it's a really pretty soap, the pink colors are perfect. Next time we will add more soap to each layer to make them more distinct. Here is side view of the soap loaf.

We have air bubbles! When we first started pouring the soap was quite liquid, if we had tamped it too hard the colors might have bled together, at least this is what we thought would happen so we didn't slam it around to much. Who knows, we could have beaten it down like crazy and it still would have been ok, this, as always, is a learning process.
Here is the group shot, we got 15 bars of soap from this batch.

And this is the finished bar of Gradient Cannabis Rose soap.
Now we return you to our regularly scheduled Monday blog report.....
But wait folks...that's not all!
Once we finished the soap we decided to make some sugar scrubs. Don't know about you, but our skin is a mess after the long winter, and since temperatures are supposed to be hovering around the high 80's this week, shorts are going to be the uniform of the day. We can't possibly have scaly legs with the shorts on!
We found a fairly easy recipe at wellnessmama.com ( +Wellness Mama ). We had all the ingredients on hand (granulated sugar, vitamin E, oils and scents) so in very short order we made the sugar scrubs. For half the batch we used coconut oil, for the other we used sweet almond oil; both work fine. We experimented as we cleaned up.

In the picture below you can see what the scrub looked like after we mixed up a batch using the sweet almond oil. The coconut batch was less liquid-y.

This is a close up of the sweet almond batch, kind of looks like grits in a sugary kind of way.

We now have 12, count them, 12 4 oz jars of sugar scrub with four terrific flavors, we marked them with painters tape until we can get a fancy schmancy label on them and jazz them up with some ribbon or raffia.

No comments:
Post a Comment