Pages

Monday, June 30, 2014

It's summer...we're busy, and not being very good bloggers!!!

Thursday June 26, 2014


Inspite of the fact that we are almost finished with one-third of summer 2014 (Alison's editorial note:  NOOOOOOO - don't say how much of summer is already gone!!), soap is being made. It is not quite the production we had last month, but we are still happily looking for scents and dreaming up new designs in our spare time.

In fact some of our soaps are selling so well we are running out of them and making more. Case in point, the hot process (HP) soap we made using Ocean Mist fragrance oil from +Natures Garden.  The following description of the scent gives you an idea why it's so popular.  


"A complex bouquet of carnations, lily of the valley, and hyacinth: underlined by oakmoss and white musk."

Quite honestly, it smells as good as that description sounds. 

Since this was a  duplication of a soap that we had made before, we used the same colorants - 1982 Blue and Titanium dioxide (white) - and added them when the soap finished cooking.


We had the Ocean Mist fragrance oil measured and ready, so next we measured the oils (coconut, sustainable palm, olive, avocado, sweet almond and shea butter) and combined them with the lye/ water.  Finally we stick blended until the mixture emulsified, covered the crock pot, and began cooking the soap.


After the first fifteen minutes the batter was getting to "gel" stage.  You can see from the picture that it is somewhat translucent.  We checked and stirred the batter every fifteen minutes or so.


This picture is about one hour into the process, it is now at the scientific "mashed potato" stage.  One way you can tell is that the batter on the side of the crock is crusty and has turned into soap, you do not want to scrape that into your batter, leave it on the side.


Judging when the soap is "cooked" is always tough. I used a PH strip which just doesn't seem to be a definitive help. In desperation I resorted to the very scientific "zap test" where I taste the soap.  Actually to perform the test, you touch a bit of the soap to the end of your tongue, and if it zaps you (and it does, think electric shock) it means the soap is NOT done.  It's like touching your tongue to a 9-volt battery.  If there is no zap and it tastes like soap, the soap is done and it's time to add fragrance and colorants.  Today there was no zap and it did taste like soap, so in went the Ocean Mist scent and the titanium dioxide (to lighten the soap color). 


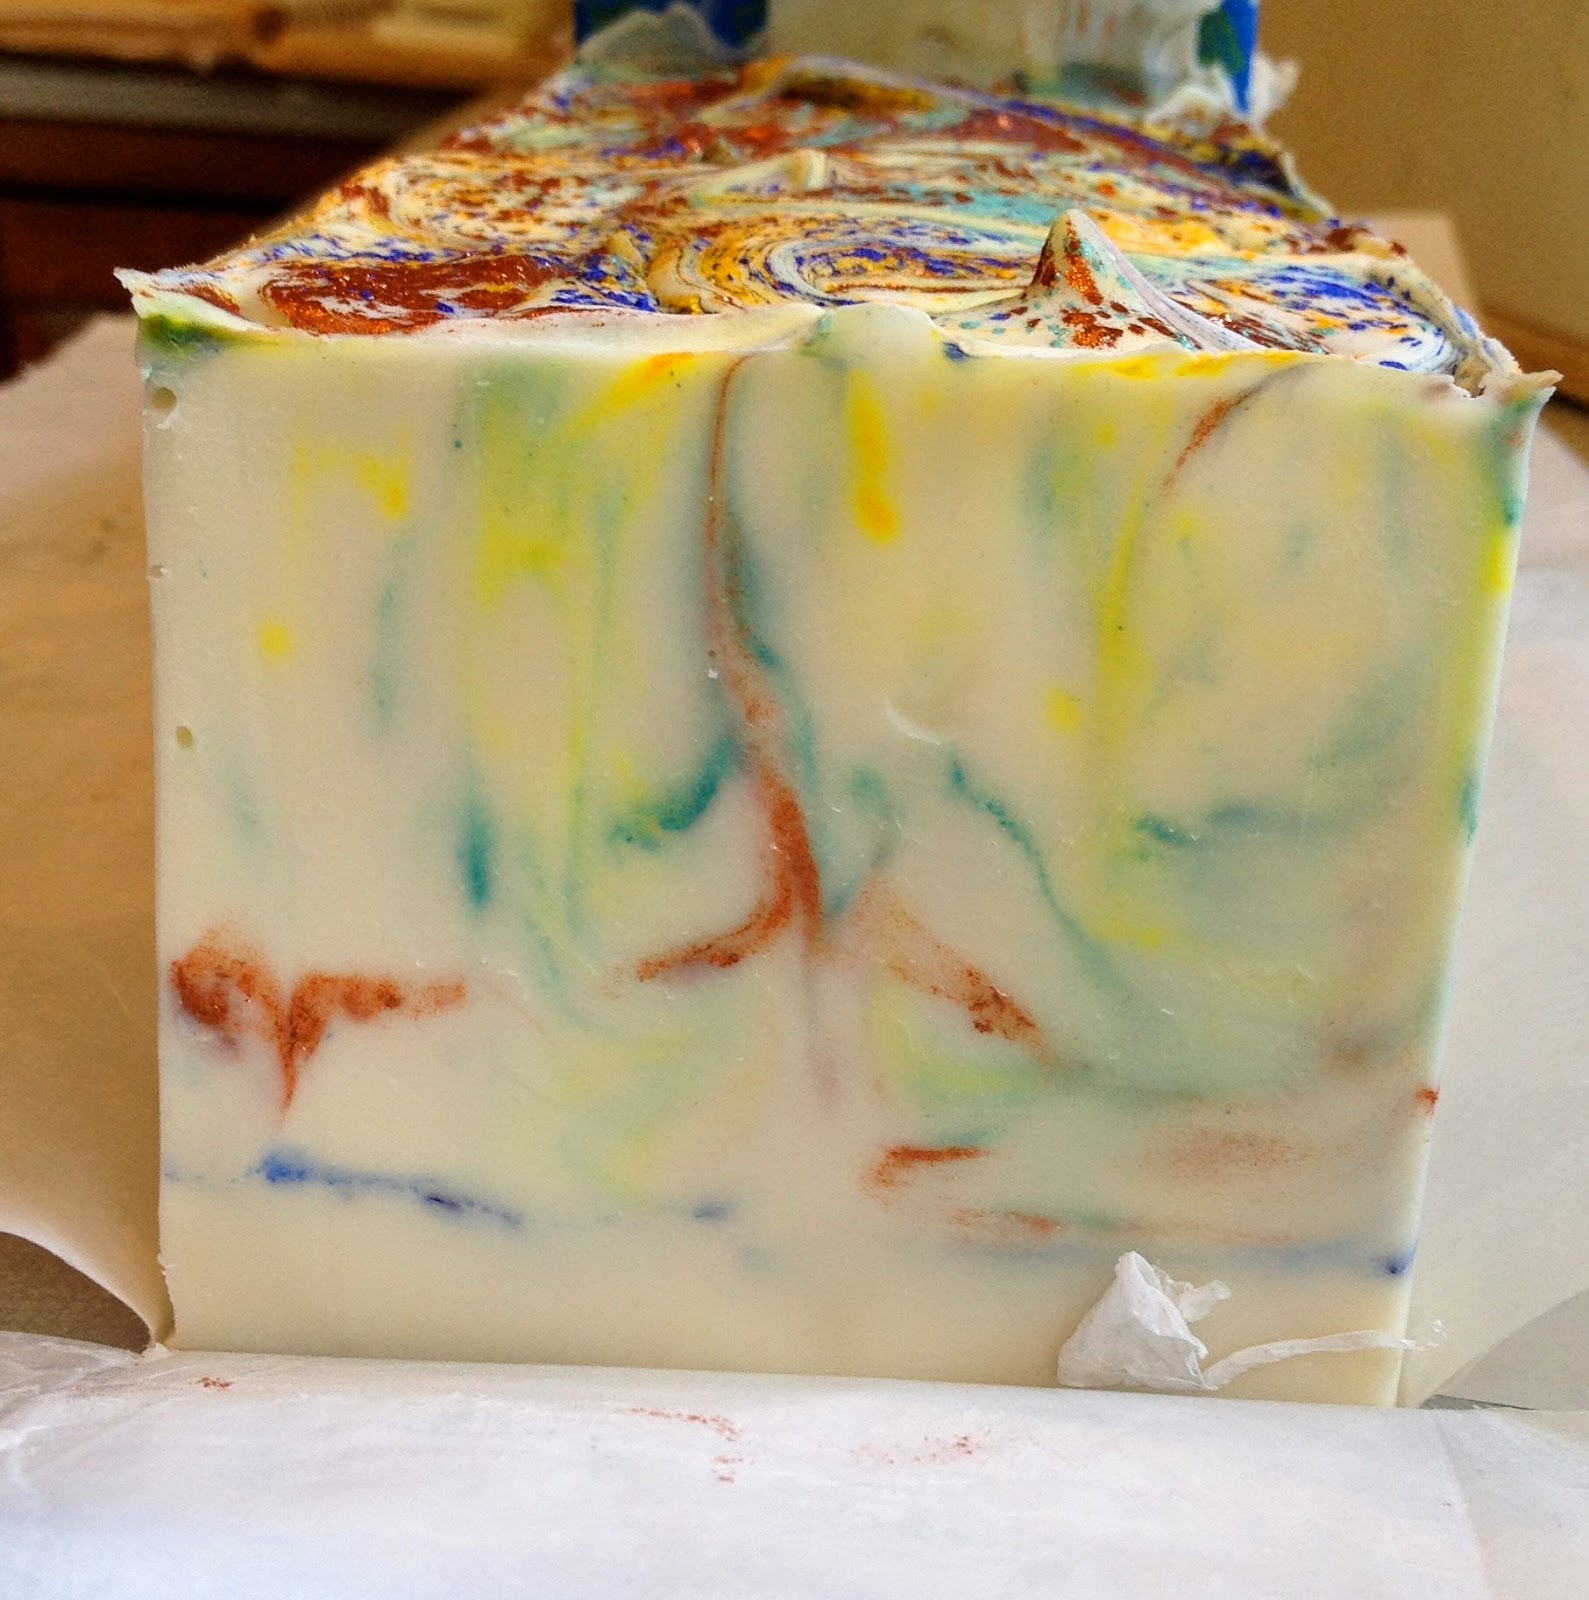
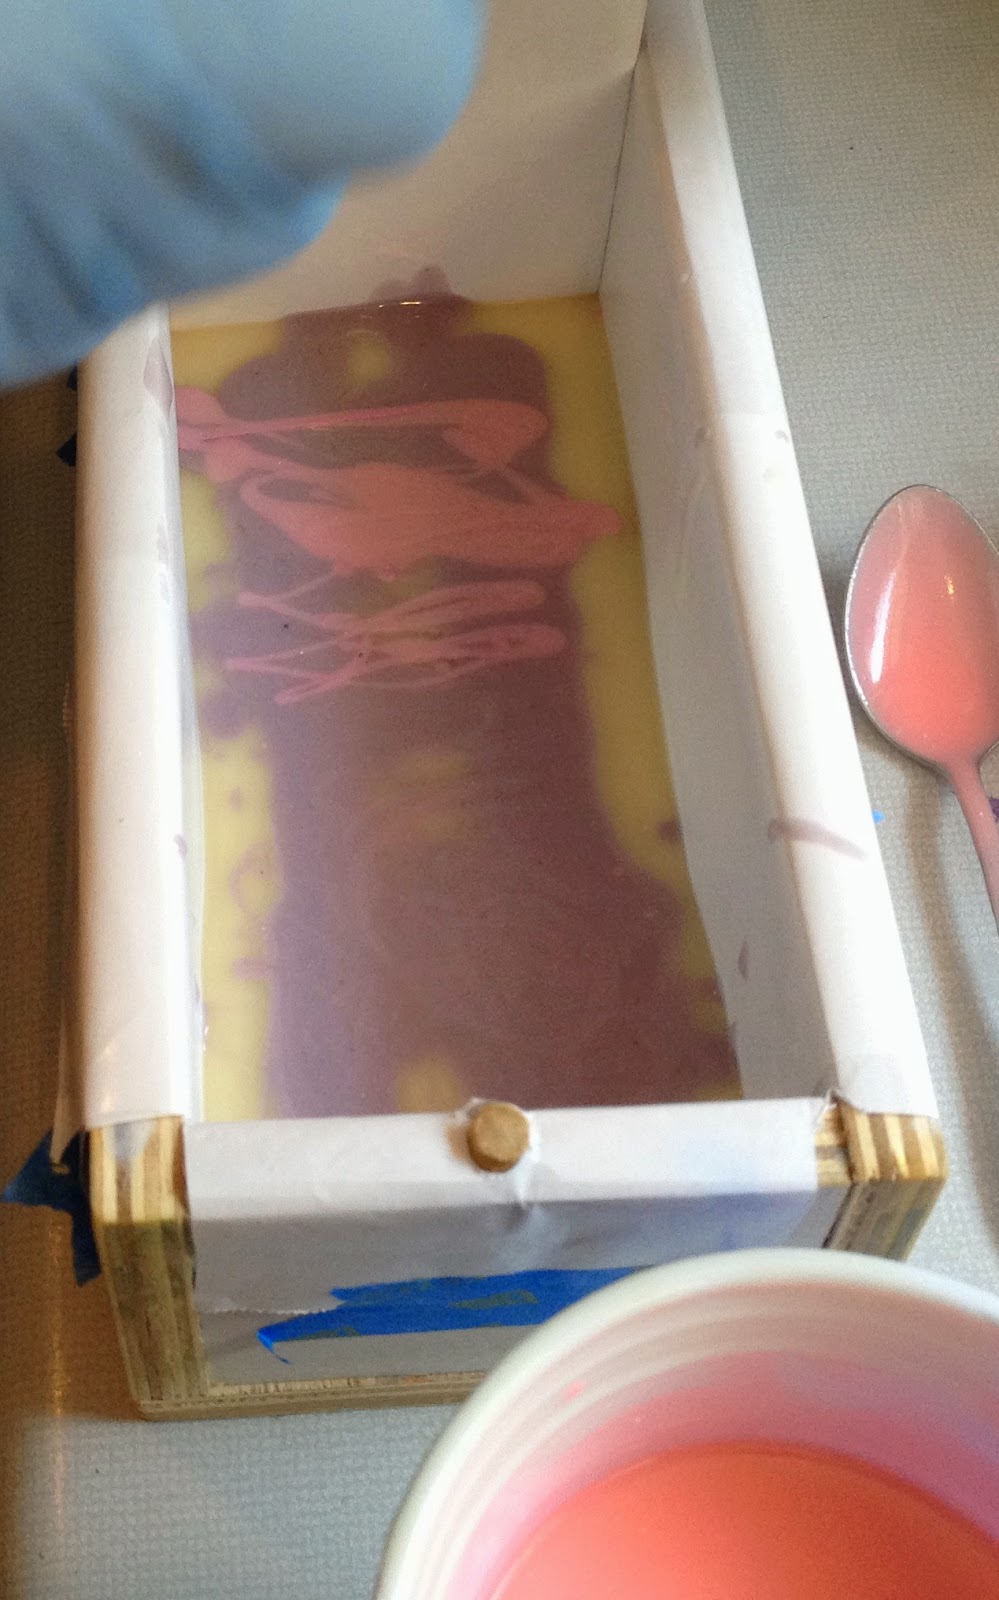
I removed several cups of batter to which I added the 1982 blue.


I mixed the blue colorant in thoroughly, then added that blue batter back to the white batter and gently swirled them together creating a swirl pattern with two distinct colors.


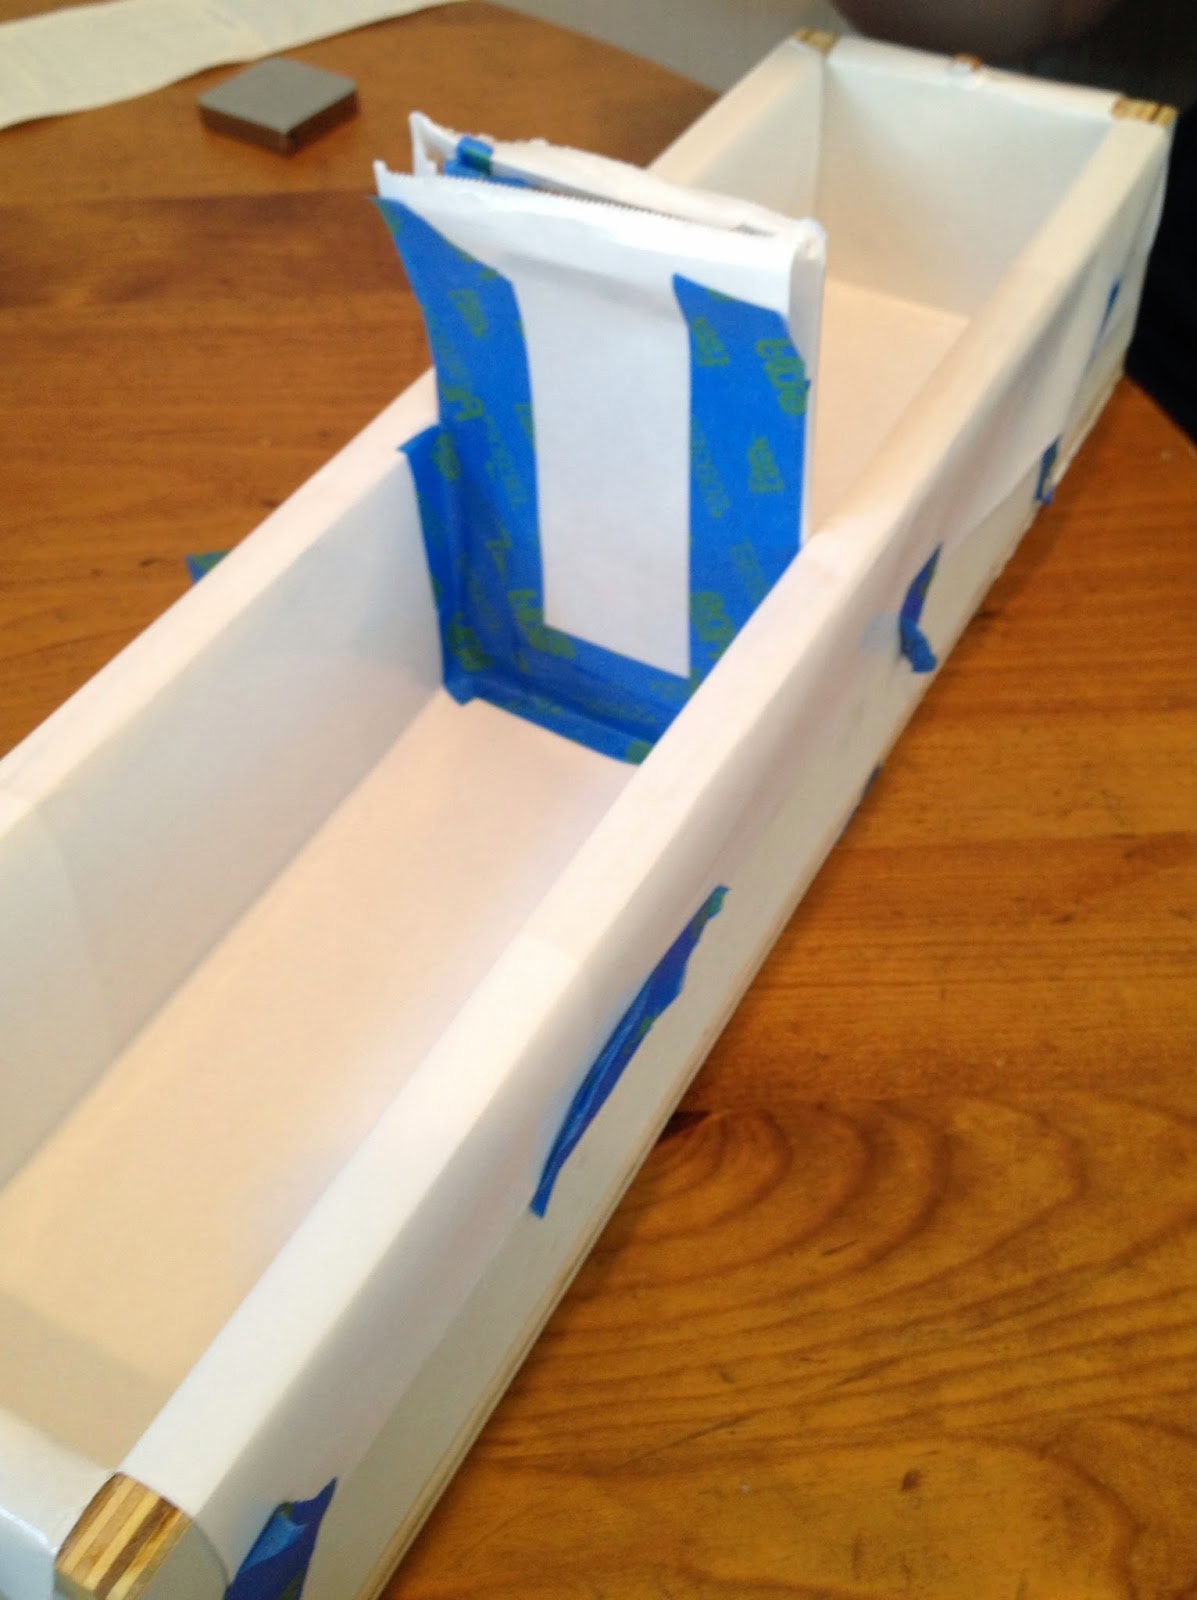
I added the soap to the log mold, tamping it down several times to alleviate air bubbles. Since the hot process (HP) method was used to make the soap we can cut it in twenty-four hours and it can be used in a week.


The soap is quite pretty and smells lovely.....Ocean Mist!


This soap will be listed in our Etsy shop soon.

Monday, June 23, 2014

Flash back to last Wednesday, why, because it's summer and the week slipped away from us


Wednesday June 18, 2014

We're sure we aren't the only bloggers having the same problem....not enough time in the day to get routine duties done, visit with company, interact with our families, have some fun (after all it IS summer), make soap then blog about it.  So, in advance we apologize for any tardy postings during the next couple of months.

Having said that, we want to show you the last two soaps we made for the Soap Challenge Club using the hanger swirl technique.

We decided to make a batch and use the divided mold so we would have two different designs.  After the slipping divider episode on Tuesday, we used thicker cardboard (covered in freezer paper), and taped it on all sides. We were thankful that this did the trick - no slipping dividers this time.


Somewhere out in the soaping Internet universe (cannot remember where or I would give credit), I saw a soap designed using sprinkled mica colorant in the layers; it was a pretty soap, and it stuck in my mind.  I suggested to Alison that we give it a try, and she was enthusiastically on board.


We picked colors (all micas) and scents; Alison using a +Bramble Berry selection of Tobacco and Bay Leaf scent and antique blue, patina sheen (dark green), and amethyst purple micas. 


 I chose a scent from +Natures Garden called Fresh Outdoors and my colors from +Bramble Berry fizzy lemonade, 1982 blue, copper sparkle and aqua pearl.  


We added titanium dioxide to the batch before we divided it to help keep the batter light.

After we mixed the oils (coconut, sustainable palm, castor and olive) with the lye/water mixture, we stick blended until the mixture emulsified.  We quickly divided the batter into two even batches.  

We both started with white for the bottom layer then we started sprinkling the mica in layers. The work area was slightly compact so we took turns adding the color.


I am on the left, and have already added the 1982 blue mica, Alison is sifting the antique blue on her bottom layer.


I am covering up my first mica layer and getting ready for the second which was the copper sparkle.


I have partially covered my copper sparkle layer and Alison is putting in the amethyst purple.


Here I am adding the aqua pearl, and Alison is covering up the amethyst purple with another layer of white batter.  As you can see the batter is getting a little thicker, still very workable though.


My aqua pearl layer is covered with batter and now Alison is sprinkling the patina sheen.

You get the idea, we added two sets of color layers and ended with white on the top.


My last color layer was yellow, here I am covering it with the last layer of white batter. 


Here Alison is putting the last layer of color on, and next we begin the hanger swirling.


It's hard to see, but we are both swirling at the same time.


This is a side view of Alison using our homemade hanger swirl tool. We covered the actual hanger with 5/16 plastic drain line, and it works fine.


We both sprinkled the color assortment on the top of our soaps, here is my mixture.


And here is my swirl pattern for the top.


Alison sprinkling the top with her color assortment.


And here is her swirled top.


We put the soap in the curing box and covered it until tomorrow, we can't wait to see what the finished soaps look like.


One of my first cuts, we are happy, the design is vivid and very appealing.


Alison's soap was very pretty, the colors were all dark, but here and there the green, purple or blue sparkled through.


An assortment of my soaps, they are all different.  The mica on the top looks terrific.


Kathy's soap


Here is a combo of Alison's soap.


Alison's soap.

We didn't choose this soap for the soap challenge, mainly because we felt there wasn't enough color, especially from a distance.  Nonetheless, we really love this technique and no doubt will try it again.

This soap will be cured in six weeks.


Friday, June 20, 2014

Tuesday, supposed to be full of grace, that's not what we would call it!


Tuesday June 17, 2014


June 17th is a special day for Alison, it's the day she was married to my husband's brother.  Being the romantic soul her husband is, they had designated Tuesday as Anniversary day and had made special plans for a lovely dinner in the NC mountains.  

Thankfully, thankfully, THANKFULLY!!! Alison wanted to stop by on the way north and unmold our first "duo" hanger swirl attempt.  

Here is why I was, and am so thankful she stopped by (all dressed up, and not in working clothes).  Since I knew Alison was going to be gone I decided to try another "duo" hanger swirl, by myself.

All was rocking along just fine. I chose colors - shades of pinks and purple for one side using The Vert as a fragrance,   


and shades of blue using Neroli Shea Blossom for the other side.


I put the divider into the mold, measured the scents, and mixed the colorants.  While the lye/water was cooling, I poured the oils and had them ready to go.  I was feeling pretty good about trying a double batch solo....little did I know what was about to happen.

My plan was to do one side at a time. 

Once the soap had emulsified, I divided the batter in two large measuring cups. In the pink batch I mixed in the Vert scent, then divided my soap into three plastic cups for the different colors, leaving some white in the bowl.  I started with a layer of white, 


then added light purple,


 bright pink,


then coral pink


 I had about half the batch in the mold and was preparing to begin the second layer.  I was thinking  that this just might be a great looking soap....


However....

Right about now I noticed the divider in the mold was sliding out of position due to pressure from the ever growing layered soap batter!  oh no, oh no, oh no!!!

Alison and her husband arrived almost simultaneously to my discovery!

When they walked in they found me holding up the divider and trying to finish the pink side with one hand......it wasn't working, not to mention how I  thought I could mix in fragrance, colors and layer the blue side with one hand holding up the pink batch!

Alison immediately knew what to do. She grabbed a pair of gloves and said, "Do you want me to hold the divider or do the blue batch.?"

"Do the blue batch!" I yelped.  

With half the mold partially filled and the batter sitting on the counter, she grabbed the Neroli Shea Blossom fragrance and in two blinks it slipped out of her hand and hit the floor, in a mushroom cloud of glass and fragrance oil, oh no, no, no.  Alison had never jumped backward and up at the same time so quickly!  I was still holding up the divider against the sliding pink batch while Alison (remember she is dressed up) grabbed paper towels and sopped up the fragrance.  Then she grabbed the broom, then she mopped and got the floor clear enough for her to stand next to me.

Oh, why couldn't we have been running the video camera today?

(Can you imagine what my kitchen smells like??? HEAVENLY that's what!)

We quickly decided on a substitute scent Wisteria and Lilac, she mixed in the scent, divided the batter, added the colors, and Alison began pouring the blue side.  After she got the first layer of white in, I let go of the divider - mistake. It started slipping again, and some of the pink color oozed into the blue side!  


             (if you look closely you can see the pink that had oozed to the left of the divider)


Eventually with Alison pouring soap into the blue side the pressure equalized and the slipping divider stopped moving.  I took over on the blue side so Alison wouldn't  have soap all over her outfit.  I concentrated on finishing up the layering process  on the blue side, then I switched back to the top of the pink soap to finish it up. 

I was happily swirling the tops of both sides, getting all creative when out of the blue......


Swirling is such fun, I was having a ball.


Then Alison quietly mentioned that I might want to actually hanger swirl the soap before I finished the top!!!  As I said, she saved the day.  Of course I hadn't hanger swirled the blue side or the pink side either, so I went back and did that. Completely messing up all the previous swirling.


That is what the blue side looked like after the hanger swirl, notice all the pretty swirls were gone.

After all the hanger swirling was completed I added a bit of the leftover colors and swirled both sides. 


The blue side didn't swirl so well,


 and just looks blue, 


the pink side did fine and, as you can see by the pictures, looks nice.  


And yes the divider wound up on a crazy wonky angle - but who cares at this point) 


We then went on to cut the hanger swirl from the day before.  These are really pretty.  We hope to attempt at least 4 or 5 hanger swirl soaps before we choose which one to send into the challenge.

This is what the soap we made on Tuesday looks like, we were excited to see how it turned out.  


This is what the side of the mold looked like when we pulled the paper liner off.


This is what the blue side looked like when it was cut into bars.
(if you are really observant you might notice a slightly pink area on the corner of the bar to the left, oozing pink soap caused this!)


And the pink side, both sides are nice, not sure if either of these will be our "challenge" soap selection, but they look and smell really nice no matter what.


Final shot pink soap is scented with the Vert and the blue soap is scented with Wisteria and Lilac. 

Cure date is July 29.