Pages

Thursday, May 8, 2014

Today's expenditures are brought to you by the letters R & D

Thursday, May 8, 2014

My sister-in-law, "K", is a very artistic person. She draws and paints and quilts and sews and and and... I am not exactly gifted in the drawing and painting department; I really can't even draw a stick figure with straight lines.  My creative talents lie more in the area of performing arts.  I create things on stage.

I do try, however.

Today, "k" is away having a great day with two of her grandchildren, so I decided to try a new technique that I have been looking at with some bit of nervousness.  My philosophy is, though, that I don't know if I don't try, and if I try and don't do well, heck!  I'll just try it again and do better next time.

Today's soap smells super super super, and I'm sure it will feel great to use once it has cured, it just doesn't look as wonderful in reality as it did in my mind.

Things have been busy in my household for several weeks now, actually due to performing arts, and today has been no exception.  After helping out with an event at my daughter's school this morning, there was just enough time to come make a batch of soap before returning to the school for another event this evening.

I was SO ORGANIZED!  Believe me, if you knew me and ever saw the desk I used to have, you would laugh at that statement.  But I really was organized today.  I had my recipe ready, ran it through soapcalc.net, and had all of my supplies and ingredients out and ready to go.


This is a recipe that K and I have both used before (found on lovinsoap.com), but I have been reading that when you add colorants to your soap, you need to account for the oils you use to mix the colorants when you are calculating the water and lye for your recipe.  The recipe does not mention adding scent to the batter, nor does it really mention how much colorant or what type, so I called upon all that I have been learning about soap making.

I knew that I would be adding colors and that I would need time to complete the artistic part before the soap began to harden, so I used the calculator (mentioned above) to add in the amount of oils I would use with the colors, and I figured the recipe with a 38% water ratio rather than 35%, thinking that would make the batter thin enough to give me some work time.

Well...the best laid plans of mice and men...(with apologies to Robert Burns for using his line of poetry this way).

I mixed the lye and water and left the mixture to cool a bit while I measured the oils, the fragrance oil, and the colorants.  This recipe  calls for sweet almond oil, coconut oil, olive oil, rice bran oil, shea butter, and sunflower oil.  I measured them and then put it into the microwave for about 30 seconds to begin melting the coconut oil and shea butter.  During that time I measured out the fragrance oil.  Today I selected Wisteria & Lilac from +Lebermuth Co because Wisteria reminds me of one of my favorite theater productions AND because I was planning a flower design.

The oils had not completely melted yet, so I measured out the oils and colorants for the decorative part of my soap.  I used sweet almond oil with my colors, and selected Fired up Fuchsia, Tangerine Wow!, Aqua Pearl Mica, and Titanium Dioxide - all from +Bramble Berry.


I went to check on my lye mixture, and guess what!  It had cooled down below 90 degrees!  That has really not happened to "K" or me yet.  Meanwhile, the oil had heated up over 115 degrees.  I was shooting for around 95 degrees with both.  So, I sat the oils in a sink of cold water to cool them down and the lye solution into a pan of hot water to warm it up.  They got as close as they were going to get, both right around 100, so I poured the lye solution into my oils.


Guess what!  Just as I began pouring, the dogs began a horrible ruckus outside.  I looked up to see the UPS truck pulling up the drive and all three dogs rushing out to greet him.  To a stranger, their greeting would not look like a welcoming one, and I didn't want him to worry, so I needed to go get the dogs, but I was there all alone today.  I had to walk away from the just-combined mixture to get the dogs.

It didn't occur to me until he left that I had gone outside in my apron, blue gloves, and goggles.  I wonder what he thought I was doing...

Side note...YAY! Our booth sign for the upcoming festival is here!!

When I got back to the mixture, I had no idea what to expect after leaving it, so I just proceeded.  It mixed just fine so I added the fragrance oil then titanium dioxide to make the soap as white as possible.  With the shea butter and the sunflower oil, it had quite a bit of yellow in it.  At this point it began to thicken faster than it was supposed to.  Uh Oh...


I mixed a bit of the batter into my colors in three different ketchup bottles, then poured white batter into silicone cupcake cups.  A bit of left over batter went into yogurt cups.  I then began adding the colors to the top of each cup so I could make the flower design.  

This particular design is achieved by making circles of color on top of each cup of soap.  I made a larger pink circle, then an aqua circle, left a white space, then put a dot of orange in the center.  Think dart board with the bulls eye in the center.

That done, I picked up the skewer and began to pull it through the circles starting outside the circles and ending in the center of the "bulls eye."  You have to wipe the skewer off with every single pass or you mix your colors.  At this point I realized exactly how quickly the soap had thickened.  The skewer was leaving channels in the soap.  GREAT!  I had no choice but to finish because leaving the circles really looked kind of silly? stupid? ugly?  Choose your adjective.  It just looked bad.

Once you have gone from outside to center in 4 places creating 4 petals, you can leave it with 4 clear petals, or you can go back and drag the skewer again but this time from center to outside straight through the middle of each petal.  This gives the flower petals a different look.

Again, nothing I could do but keep going.  So I did.  After I made the petals, I banged the pans on the counter several hard times to see if the channels would close in as the soap settled.  It seemed to help.
I boxed the soaps up and wrapped the boxes in towels so they can gel for 24 hours.  Tomorrow K and I can check them.

Today was definitely about research and development.  We don't like to waste our supplies - way too expensive - but practice makes perfect (at some point).  I really can't wait to try this again.


Our Kudzu isn't pesky, it's heavenly especially in soap and candles


Tuesday May 6, 2014

We got started a little late this morning. Our best intentions always seem to wind up lost between book work, new scent trials, and showing each other the latest find on the computer. The computer finds are the kiss of death because inevitably we travel from the initial "item" to fifty thousand other sites, and by the time we look up, 45 minutes have passed with nothing to show for the time.   We are sure this problem is more than likely universal, just part of the information overload that the world wide web gives us - a good thing, right?

After said late start we decided on a HP (hot process) soap, mainly so we can have it in stock for the upcoming Mountain Laurel Festival (May 17th in Clarkesville, GA).  As we've mentioned HP soap is ready to use in a week so it was ideal for us.  

The scent we chose is a beautiful blend of florals and quite honestly does smell like it's namesake Kudzu!  We are going to make soap and candles today so lets get started with the soap.


All of our reading and Web research has led us to begin thinking about things like water percentage and superfatting our soap, or, adding a small percentage of extra oils for better suds or for more moisture.  Because we would be using the HP method we decided on a slightly higher water concentration (only 3% higher) , entered our amounts into soapcalc.net, and were ready to roll.

With crock pot at the ready, we added coconut, palm, olive and castor oils.  We added the lye into our water (never add water to lye - very dangerous), and once it had cooled a little added it to the oil mixture.


We mixed it with the stick blender a few minutes until it was most certainly emulsified.


It took about 5 - 10 minutes to cook enough to be very still, we actually ditched the spatulas and used a heavy stainless steel spoon, we kept on mixing.  Sometimes it seems that just as we are beginning to feel like we are getting good at this, something different happens.    


The directions for HP soap always refer to "mashed potato" stage, and we have seemed to hit that stage rather quickly the last two times we used HP.  Well ok the picture above looks exactly like really smooth mashed potatoes, but it didn't look exactly like it had before.  We just didn't believe this could already be ready.  It just hadn't been long enough, so we took the dreaded Zap test!  "A" now understands exactly why it has been called the zap test.  YUCK!

We put the lid back on the crock pot and let it continue to cook.  After a bit the bottom layer began to gel a bit, then pretty soon the whole batch was gelling.  AHHH!  Finally a stage that we recognized!  Before much longer the soap got to the "mashed potato stage and it was time to add the colorant and scent.  It cooked for about an hour and a half this time.  

We decided to use TD (titanium dioxide) and Chrome Green Oxide because after all Kudzu is green, right?


First we mixed the TD into the soap to lighten it up. 


After the TD was thoroughly mixed in we scooped out about 1/3 of the batter and added the green colorant.


Again we made sure the green was completely incorporated into this portion of the soap.  


We added the green back to the main batch of white soap and gently swirled them together with a spoon, we wanted a distinct green and white soap.


Once it was mixed up enough we put it into the Bramble Berry ( +Bramble Berry )  18 bar wooden mold. We did tamp it down pretty hard to make sure all air bubbles were out of the soap, then we placed a piece of freezer paper over it and pressed the soap into the mold smoothing the surface in the process.  Finally, we added the plastic bar dividers 


Once they were in we made sure they were pushed all the way through the soap and pushed down a few high spots.  


It's now Wednesday May 7, 2014.  Today "A" and her daughter "E" worked labeling, organizing, and generally making Soap Lily more streamlined. No more wasting 15 minutes looking for the tape or funnels; everything now has a "spot". Thank you "E"! 

"K" spent the day in NE South Carolina keeping an eye on 2 of her Grandchildren.  

Before A and E began the organizational portion of their day, they first un-molded the Kudzu HP soap. It is a beautiful HP soap, and it does smell just like blooming Kudzu. The following picture is the group shot followed by the solo picture of this soap.


Just in case you wondered, it smells very, very good.


Back to Tuesday's creative flow now - the candles. We made green, Kudzu scented candles to go with our HP soap.

Using a new (easier) method, we hot glued the bottoms of the wick to the inside base of the jars.  We calculated the amount of wax we needed to fill 4 pint-sized jars with melted wax.


Gluing the wicks down


Tape so the glued wicks won't fall over after the wax is poured.


We started by measuring over 40 ounces of wax into the melting pot then submerging the bottom of the pot in hot water (med high temp on stove) so the flakes would melt.


We kept an eye on the wax, and after 100% of it had melted, we added half a block of Lime colorant.


Melting wax


Adding half a block of lime green colorant to the completely melted wax


The color block begins to melt as soon as it hits the hot wax.


The color block is pretty much melted, and you can see the wax is now a dark green color. See "A's" reflection peeking over the edge of the melting pot? We added the fragrance oil when the melted wax had cooled below the fragrance's flash point (temp at which the scent would just "burn off" and lose its potency).


Once the wax had cooled enough, we poured the wax into the prepared jars. So far, this process has been pretty stress free.

The last picture shows the 4 finished candles, the color, once it cooled turned out to be a bright fresh lime green color, which is exactly what Kudzu plants look like when they are leafing out.  Once they completely cooled off we trimmed the wicks and added the labels, the candles smell terrific!


Our first try at coloring candles, paying respect to the acres and acres of Kudzu covering the state of Georgia (and the south). We present
Kudzu Candles!

Wednesday, May 7, 2014

Pink - soap, oh and some neat sugar scrubs. We had a busy Monday. #graduatedlayers


Monday May 5, 2014

We both had such a restful, laid-back weekend while our families waited on us hand and foot, did all the cooking, weeding, laundry, cleaning, and..... just who do we think we are kidding here???  

We both did what we do over the weekend  which had nothing to do with fantasy listed above*, this morning however we were raring to go.  

First things first. Last Friday "A" was occupied taking kids to eye doctors and various other motherly deeds, so she hadn't sampled the wonderful scents that arrived from the Lebermuth Company ( +Lebermuth Co ).  So we had a mini scent show, and oooh'd and aaaah'd over the new EOs (essential oils) and  FOs (fragrance oils):  Sweet Pea and Ivy FO, Lavender EO, Litsea Cubea EO, Peppermint EO, Bug be Gone FO, Lily of the Valley FO, The Vert FO, Wisteria and Lilac FO, and Oatmeal & Honey FO. 

Yes, we might have gone just a little overboard.

We love all the new scents and actually used a couple today in some sugar scrubs we made, but more about that later.  First we will show you the soap we made today.

Whilst looking at the multitude of soaps and soap blogs and all things soap related on the internet "K" had seen a gradient color soap that caught her eye. Since we now have a pile of new colors and scents, it was difficult to decide which to use.  Ultimately, we decided to go with pink and use the Cannabis Rose fragrance oil we just got from Natures Garden +Natures Garden ), which by the way reminds us of the old heirloom roses that smell like, well....heaven.

The concept for this soap is to have the very darkest shade on the bottom layer of the soap, with each layer getting progressively lighter with white topping it off.  

The two pinks we just got from Bramble Berry  ( +Bramble Berry   ) are on the opposite ends of the (pink) color spectrum and neither was exactly what we wanted, so we improvised and mixed the colors, using 1/4 tsp of the neon pink with 1/4 tsp of the ultramarine pink, this combo was exactly what we wanted.  We added TD  (titanium dioxide) to the soap to lighten it and we were ready to go.


The directions that we found for this design seemed a little tricky, but understanding is sometimes in just doing it.  If you're thinking of trying this technique, don't worry.  You can do it!

First figure out how many cups of soap you have, then decide how many gradient color layers you want, (we went with 7).  We had 8-1/2 cups of soap, so we broke it down into 7 portions of approximately 1-1/4 cups each, (remember this is supposed to be fun and does not have to be exact).  

For the first "layer" we combined of 2 the seven 1-1/4 cup portions for a total of 2 1/2 cups of soap to which we added the pink colorant, in a blink we had the darkest gradient of pink.  


Of that darkest pink, we only put 1/2 into the bottom of the mold.  Once we spread about half of the dark pink  into the mold we added another (approximate) 1-1/4 cups of what we will call white soap to the dark pink we had left over after the first pour.


The addition of the white to the dark pink  took the amount back up to 2 1/2 cups and lightened up the soap a shade.  We spread this lighter pink over the darker pink using about 1-1/4 cups of soap.  Again we kept about 1-1/4 cups in the measuring cup and


 added another (approximate) 1-1/4 cups of white to lighten the soap yet again.  


We hope you can see a pattern here, each new layer that goes in the soap lightens the soap a "gradient" shade at a time.  


The color is much lighter after several pours,  the picture below may look white, but it is a pale, pale pink.  The soap was getting really thick by the time we got to this layer, we were spooning the soap rather than pouring.  Almost finished!  


The next picture shows the last layer, you can see we were at THICK trace, the soap is white at this point, if you look closely you can see various shades all over the mold where the soap spilled as we poured.


The last picture (until we show you the cut soap) is the soap after we had swirled the top, it was ready to go in the cure box then be insulated with towels for the curing.  Hopefully our "gradient pour" soap will look good. We always seem to have our doubts when we try a new one, but after all, this is fun. And, the soap does smell like we've fallen into a bed of rose petals.


Tuesday, May 6, 2014 we opened the soap this afternoon and we were  surprised to find a small crack right down the middle of the top, we have no idea why it cracked, but will get on the computer and see if anyone else has had this problem.  


The soap isn't exactly like we thought it would be, but it's a really pretty soap, the pink colors are perfect.  Next time we will add more soap to each layer to make them more distinct.   Here is side view of the soap loaf.


We have air bubbles!  When we first started pouring the soap was quite liquid, if we had tamped it too hard the colors might have bled together, at least this is what we thought would happen so we didn't slam it around to much.  Who knows, we could have beaten it down like crazy and it still would have been ok, this, as always,  is a learning process.  

Here is the group shot, we got  15 bars of soap from this batch.


And this is the finished bar of Gradient Cannabis Rose soap.
Now we return you to our regularly scheduled Monday blog report.....


But wait folks...that's not all!


Once we finished the soap we decided to make some sugar scrubs.  Don't know about you, but our skin is a mess after the long winter, and since temperatures are supposed to be hovering around the high 80's this week, shorts are going to be the uniform of the day.  We can't possibly have scaly legs with the shorts on!

We found a fairly easy recipe at wellnessmama.com ( +Wellness Mama ). We had all the ingredients on hand  (granulated sugar, vitamin E, oils and scents) so in very short order we made the sugar scrubs.  For half the batch we used coconut oil, for the other we used sweet almond oil; both work fine.  We experimented as we cleaned up.


In the picture below you can see what the scrub looked like after we mixed up a batch using the sweet almond oil.  The coconut batch was less liquid-y.


This is a close up of the sweet almond batch, kind of looks like grits in a sugary kind of way.


We now have 12, count them, 12  4 oz jars of sugar scrub with four terrific flavors, we marked them with painters tape until we can get a fancy schmancy label on them and jazz them up with some ribbon or raffia.


Monday, May 5, 2014

A better version of Burma Shave, our latest creation - shaving soap!


Thursday, May 1, 2014

We said it a couple of days ago and we will say it again, how can it possibly be MAY already???

Should we start thinking about Christmas shopping? Oh, heck no! We won't go there. Sorry if we made anyone get queasy, it's just that, wow, the days are flying by.  

Today "A" had her wish come true.  She has wanted to make a shaving soap since day one, and today she did.  Bentonite clay is necessary for shaving soap as it helps the razor glide across the skin.  The clay arrived yesterday in the  Bramble Berry ( +Bramble Berry ) order. 


Today the delivery Gods were smiling on us once again, and the shipment from Natures Garden+Natures Garden ) arrived with a ton of fantastic new scents.  One of them was a trial type "sample size" of ....


Yes, it actually smells just like we hoped it would.  The description said "spicy-sweet blend of French verbena and lemon, a green Florentine Iris and violet leaves, and sublime notes of Mysore, sandalwood and ambergris".  

We weren't sure what violet leaves smell like, Mysore, we have no clue, but most of it sounded great so we took a chance and bought a sample; we were not disappointed.  This scent smells delicious and perfect for shaving soap.  It was meant to be!


Since it was a sample size, there wasn't really very much fragrance oil in the bottle, so we decided to make 1/2 the batch scented and the other half non scented.  In our usual creative mode we rigged a divider for the 5 pound loaf mold, granted it looks amateurish, but it worked!


Knowing ourselves as well as we do, we took the extra precaution of marking the paper with scented and unscented, so tomorrow, when we un-mold it, we won't ask each other, "Uh, which one is which?" We are so smart!


Today "A" was the purveyor of soap, and it was "K's" turn to mumble into her computer whilst looking for a great price on coconut and palm oil.  She's still looking and may have to head to (shudder) Walmart!

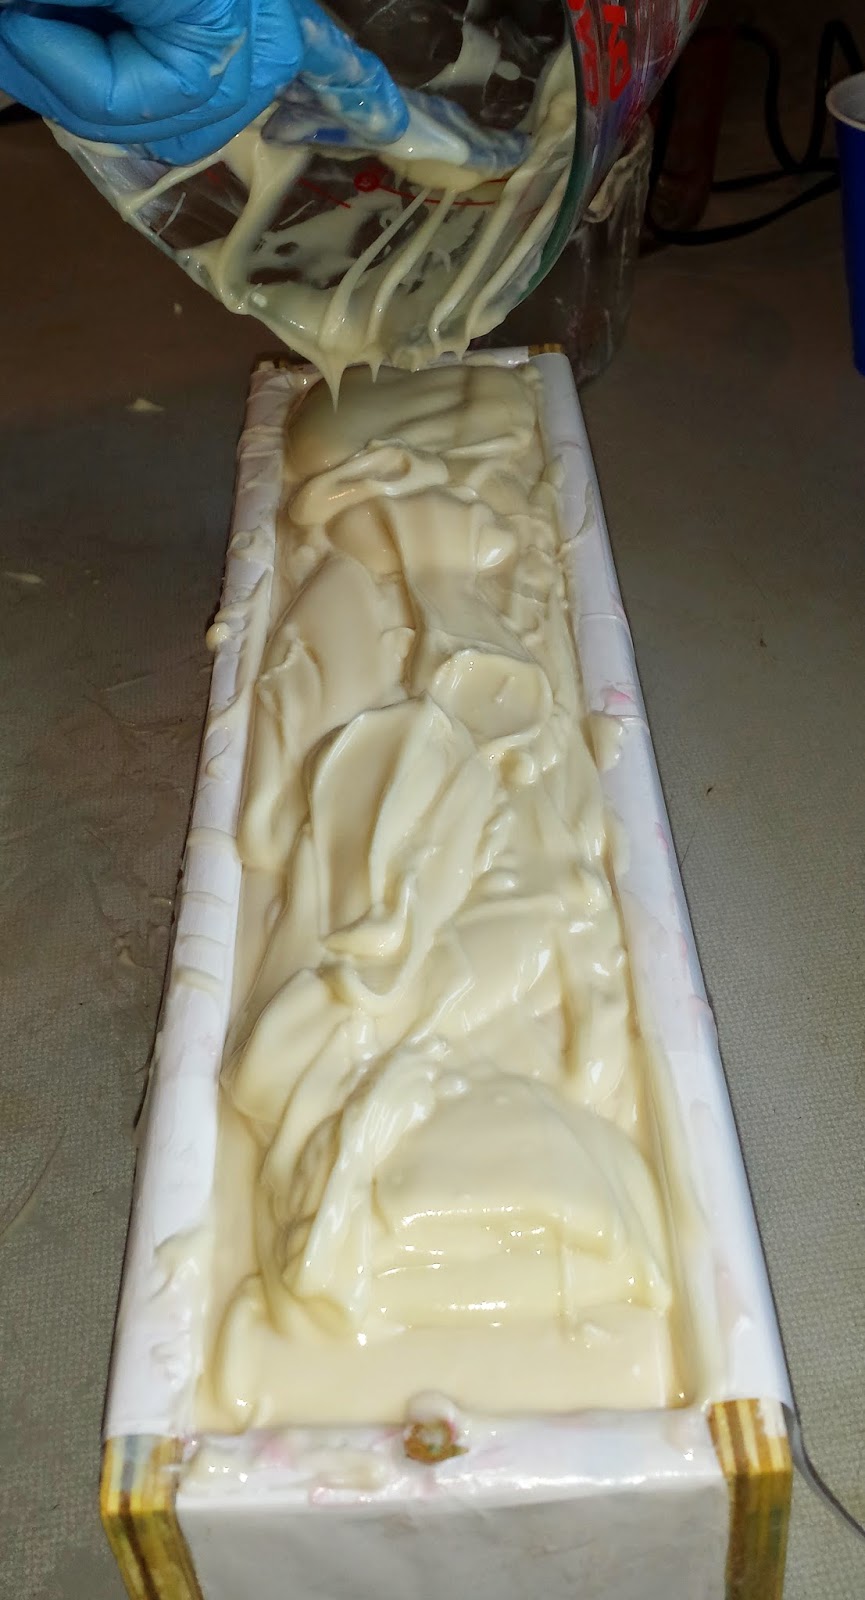
The recipe came from Steve at Soap Making Resource, and it included the following oils: Olive, Coconut, Castor, Palm, and Sweet Almond.  We used the Bentonite Clay as well as colloidal oatmeal (regular old fashioned oats finely ground).  The recipe called for the soap to be in a mayonnaise like state when you pour, and we translated that to mean a heavy, heavy trace.  We were comparing what we had with pictures on line, and we poured it when it looked like this.


You can see how thick it is, like pudding on steroids.  We poured the unscented half into the mold, then added the scent to the remaining half and finished pouring. 


We tamped it down a few times so we won't have air bubbles in the soap.  We took a picture and put the lid on it until tomorrow when we will get it out to cut.


Friday evening:  Tried to remove the soap, it was basically solid, but still fairly soft, decided to give it another 24 hours.

Saturday night:  Removed the soap and cut it, we got 8 bars each of scented and unscented.   Since we did not use any color while making the soap the gray must come from the clay.  There is a slight shade difference between the scented and not scented, with scented being the darker of the two.  


Scented on left, unscented on right


The soap was very easy to cut.  not sure why it is so soft, might be the clay, it will probably harden with time. 


You can see the fine specks of oatmeal in this picture, this is the scented soap, a bit darker than the unscented (see next picture).


When looking at the individual pictures it's hard to tell the difference in color, however if you scroll back to the group shot you can see the scented is a shade or two darker than unscented.  We can't wait to try this one out, it should be ready in time for Father's Day.